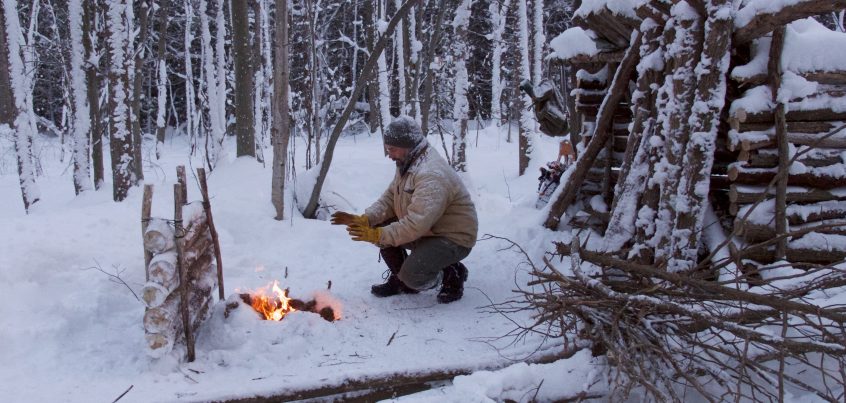
You really can’t say that you’re a bushcrafter until you have mastered the art of campfire, but even simpler, to become an experienced camper its important to learn a few ways to start a campfire. Whether you want to combat the freezing cold weather, cook a hot meal or even defend yourself against wild animals, campfire is always your best friend in the wilderness. Therefore, it is important to learn how to build a roaring fire that is easy to control and yet lasts long enough in all kinds of weather.
This video "10 Campfire Layouts to INSTANTLY up your camping skills" is a great resource for anyone wanting to learn how to make a campfire.
By learning a few of these classic bushcraft fire layouts you can immediately improve your bushcraft skills.
The basics of campfire
You need three things to build a fire successfully: oxygen, fuel and ignition. As oxygen is plentiful and readily available in most cases, you must worry only about the remaining two components.
- Fuel: There are basically three types of fuel you can use: firewood, tinder and kindling. Firewood is the main fuel keeping your fire going and should be laid down first. Tinder consists of small twigs, dry leaves, needles or tree barks. Kindling often comes in the shape of small sticks about one inch thick. Kindling must be put on top to start the fire.
- Ignition: You can light up the fire with either a match or lighter. It is also recommended that you blow at the base of the fire to provide more oxygen and facilitate the process of ignition.
Looking for a Bushcraft T-Shirt?
Explore the Shop!
The most popular campfire layouts
- The Tee Pee: The layout is built by forming a cone shape around a pile of tinder with many sticks.
- The Central Pole: It is just like the Tee Pee design except for the addition of a big stick in the center to increase stability for the structure.
- The Haystack: Put your kindling on top of the layer and then stack firewood randomly around the pile.
- The Hunter: You put two big logs parallel to each other on the ground with tinder in between and small sticks hanging over the logs. This design is great for campfire cooking.
- The A-frame: To build the A-frame, you first need a big log, rock or a fire pit. Place one end of a single stick up on its edge with tinder beneath. Next, stack other sticks on either side of the central stick like an asymmetrical fishbone.
- The Lean-to: This one resembles the A-frame but instead of a “fishbone”, you must stack multiple sticks side-by-side, each with one end tilting upwards on the edge of a log or fire pit and the other end on the ground. Tinder is placed beneath the sticks.
- The Lever-bar: It is similar to the A-frame. The only difference is that the central stick can be used as a lever to raise or lower the firewood.
- The Trailguide: This is our original design. You need to place three or more sticks vertically at an angle of 70-80 degrees so that the lower ends on the ground are close to one another. (Imagine it to be like an upside down Tee Pee design). Then place your tinder and additional firewood in the middle. This layout helps keep the tinder off the ground and is consequently ideal for campers travelling in wet or snow-covered terrain.
- The Council (aka the Platform or the Upside-Down Fire): You build the Council layout by laying a row of your widest pieces of firewood, then add about 3-4 more layers of firewood to the top. Put the tinder on the topmost layer then light up to start the fire. The Council design can keep the fire going for a long time even in wet or snowy weather.
- The Log Cabin (aka the Pyramid): This is one of the most popular campfire layouts. You start with a pile of tinder on the ground, place two pieces of firewood on either side of the pile then turn 90 degrees and put two smaller pieces on them so that the four pieces form a square. Repeat the process but make sure that the layers of firewood get smaller when going up until you have built a “cabin” around the tinder.